
NA Miatas are severely lacking in interior lights. Stock, the ’94 had only one tiny light for the passenger footwell. Luckily, Mazda improved the interior lighting with each iteration of the Miata, so it’s easy to source an overhead dome light from a newer model.
Moss Miata offers a kit that adds lights in the small trim panel cutouts near the transmission tunnel, see that write-up here.
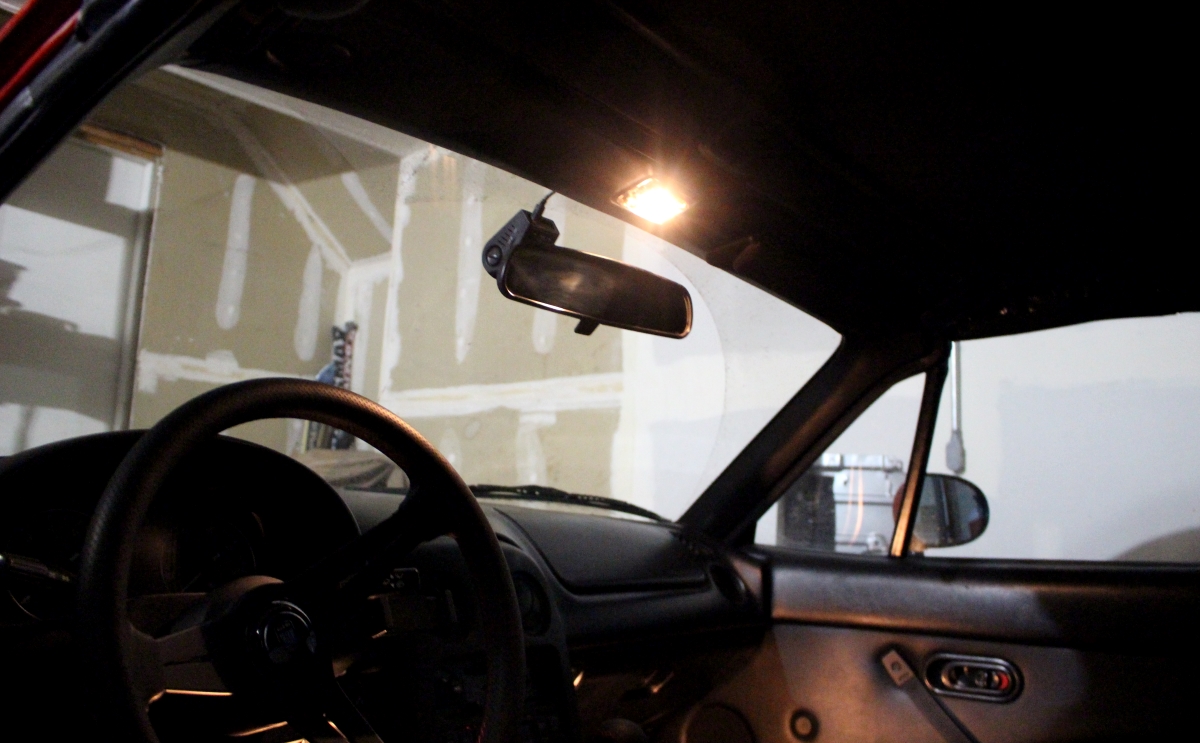
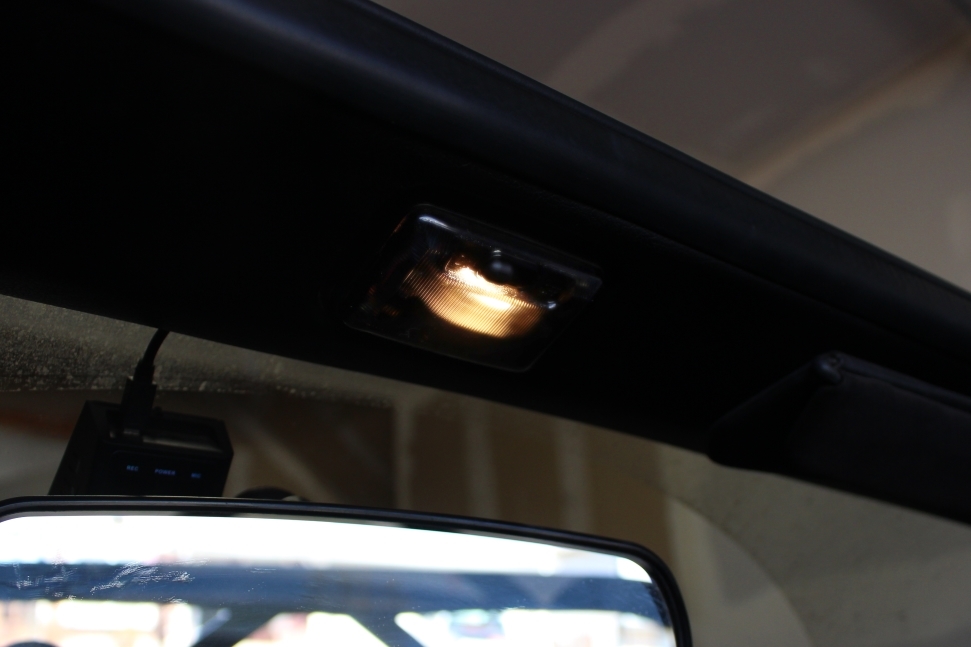
For the 1996 model, Mazda replaced the rear view mirror with an overhead dome light, and instead attached the mirror to the windscreen. Some people replace the whole mirror with a different model from Ford or elsewhere that has a built in map light. However, this has the added advantage of moving the rear view mirror lower, which gives a tall driver like me a better view out the back, especially with a rollbar.
I was able to source these parts from a ’96 at my local junkyard:
- Dome light
- Upper windshield trim
- Rear view mirror
Some rear view mirror glue is also needed from the auto parts store.
The junkyard light was pretty scratched up, so I also bought a new lens from Priority Mazda for $4.13; part number NB38-51-311A

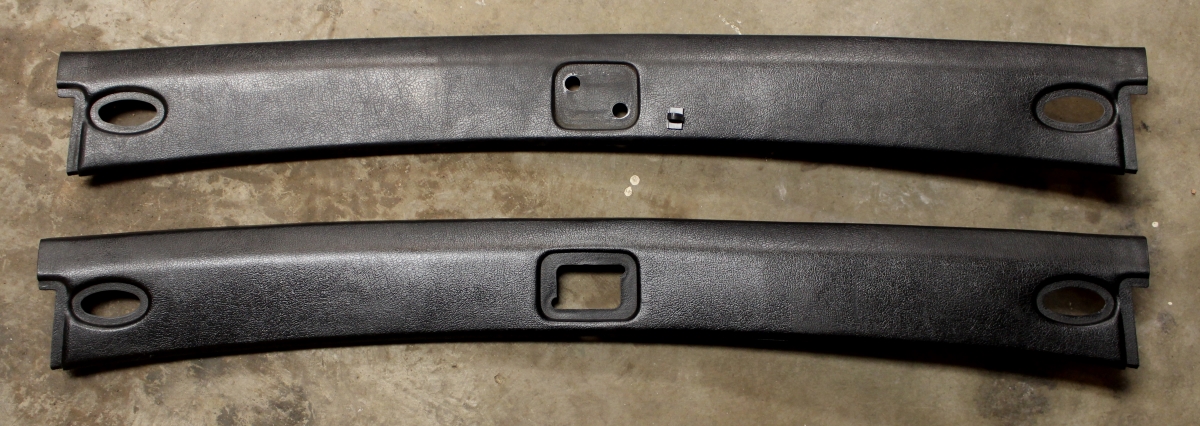
I was initially skeptical that the upper trim panel was needed, since there is already a square for the mirror, but it turns out the panel was redesigned for the dome light with a larger cutout. It’s hard to track down the part number for this trim, but it might be NA01-68-090E.
Step #1 is removing the stock rear view mirror, this is a fun one! Just give is a good yank and it will pop out of it’s socket. The mirror is designed to break away like this in a collision. (Do not try this with a mirror glued to the windshield!!)

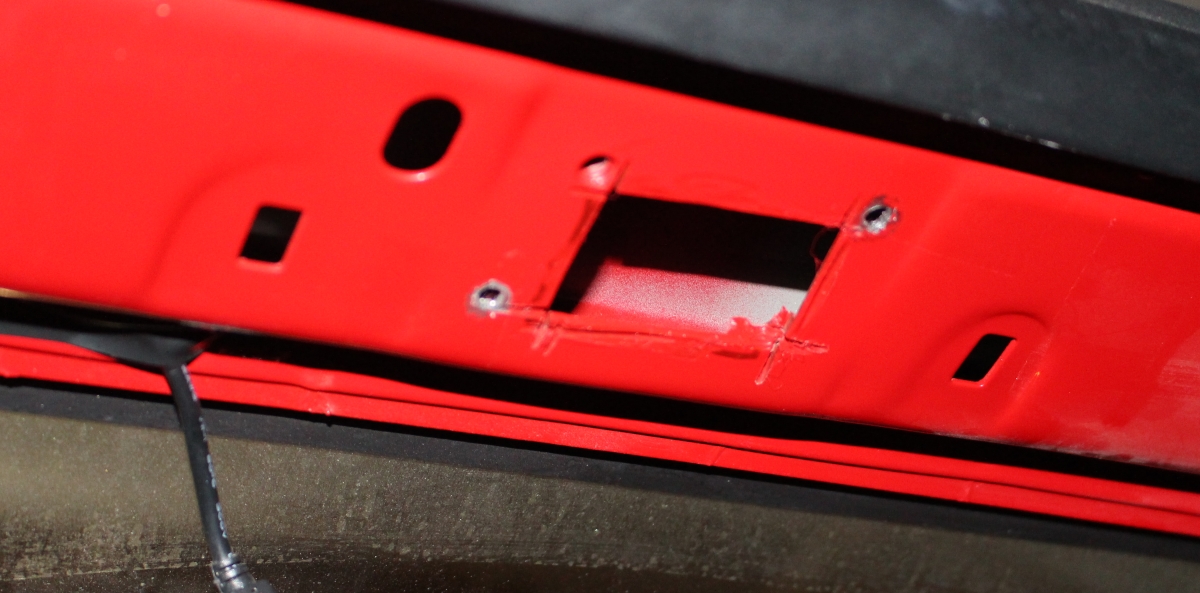
After this it’s pretty easy to remove the upper trim by unscrewing the mirror mount and convertible top latch strikers (Torx T-40). Gently pry the panel off. At this point it becomes obvious that the new dome light will not fit without some cutting.
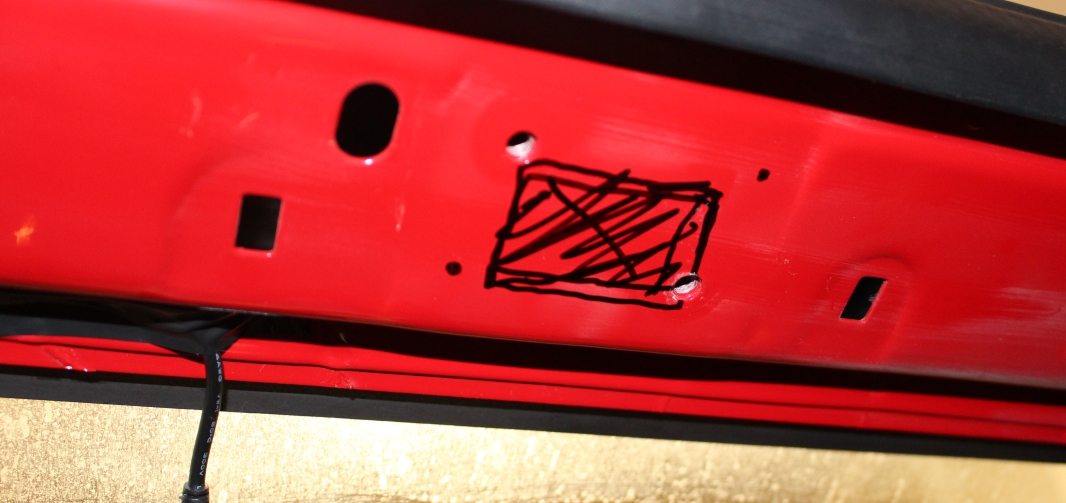
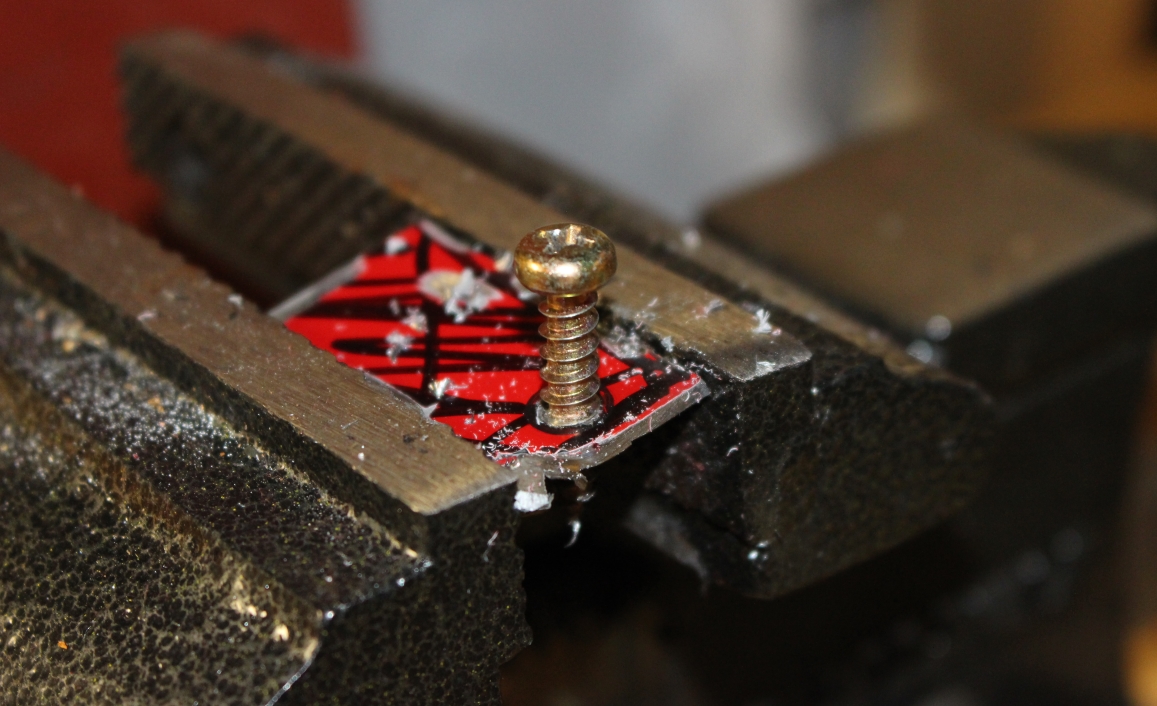
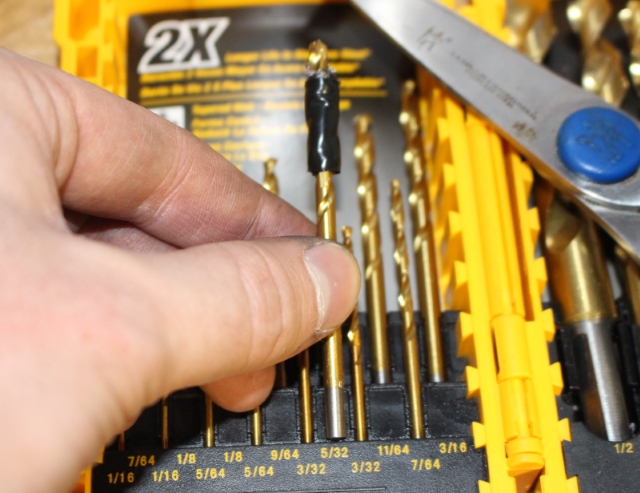
I used the new trim panel to find the correct place to cut, and made the opening with an angle grinder. Then, I used some of the scrap to find the correct size for the screw holes (5/32″). I marked the hole positions using the dome light, and used some masking tape to prevent the drill bit from going too far.
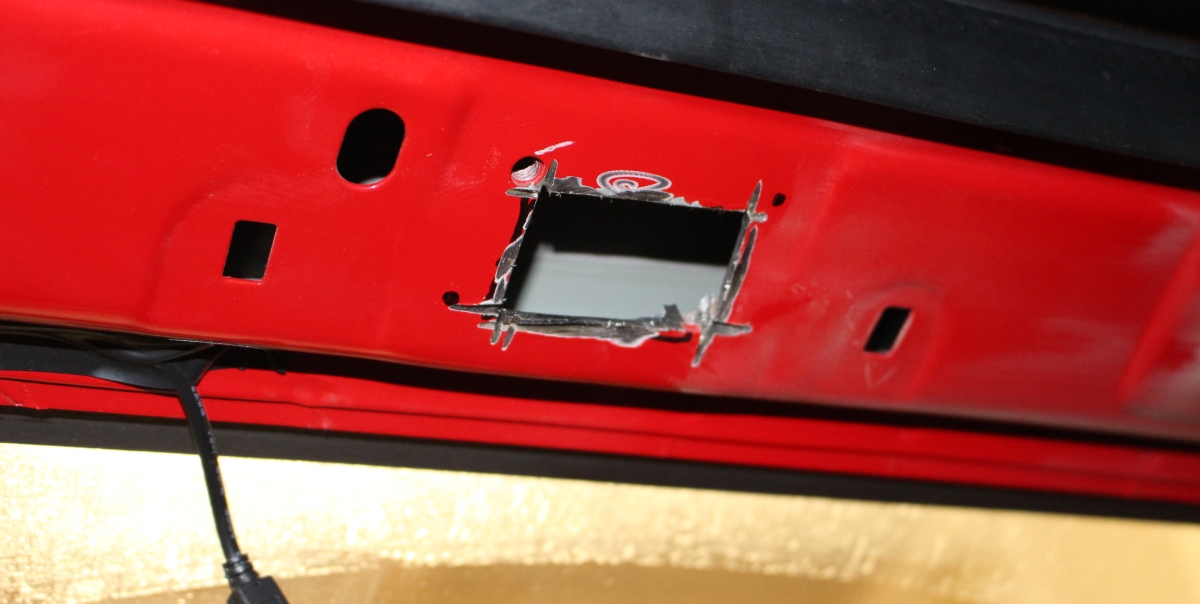
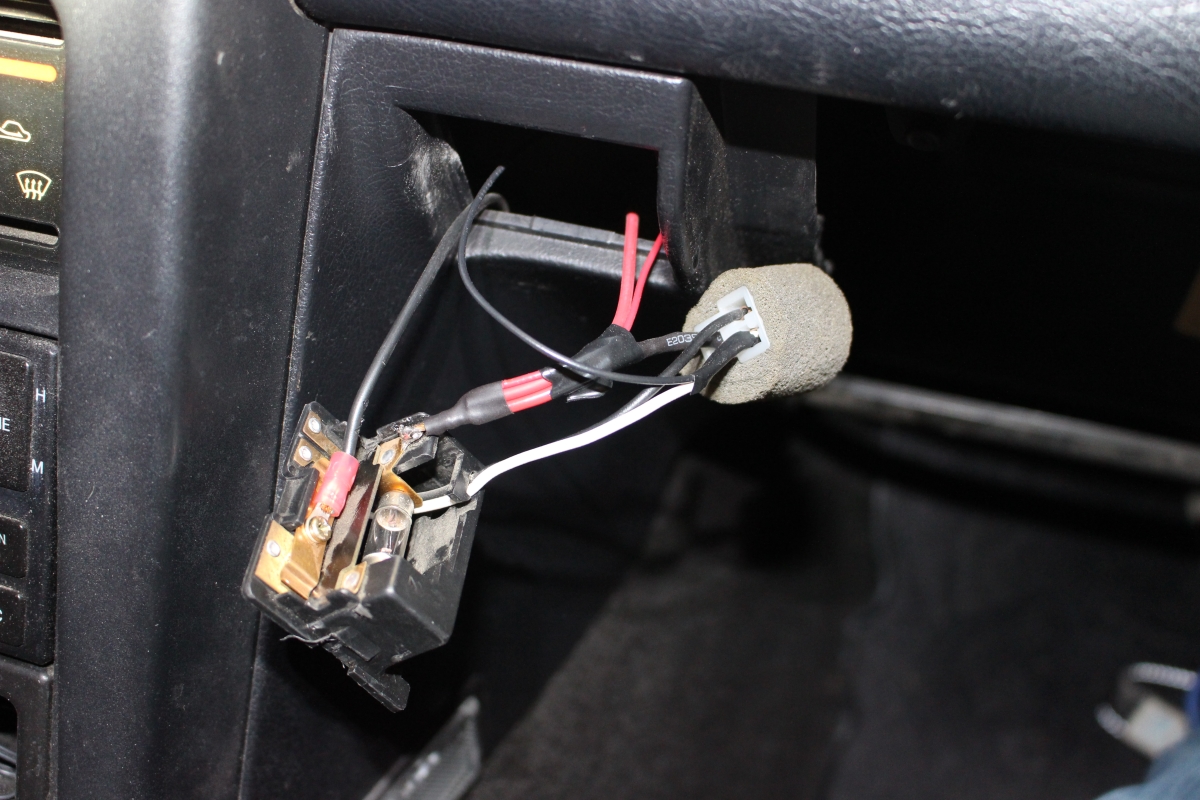
I ran the wiring for the new light down the passenger side A-pillar, so it would be easy to splice into the light control on that side. One of the mounting screws for the light is the ground connection for the ON position. I drilled the hole for this screw after painting, so it would have a good connection to the body metal. The wiring is simple, but it takes a little work with a multimeter to figure out which switch terminals and existing wires to connect. The new dome light needs one wire for 12V power and another for the door switch.

The last step is to attach the new rear view mirror with special mirror glue. It’s helpful to trace with a white board marker where the mounting button should go. It would be helpful to have another person checking the position of the button while it’s being glued, mine turned out slightly off angle.
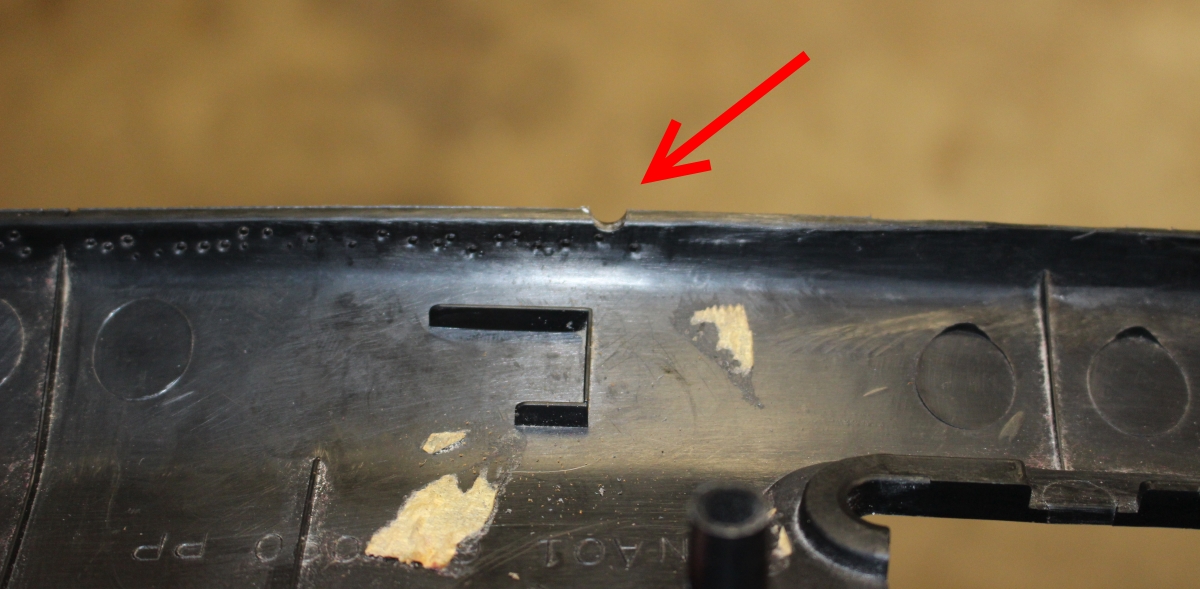
I also cut a small slot in the new windshield trim for my dashcam power wire.
Then, just reattach the plastic trim and convertible top strikers.


Nice mods! Very detailed post!